Likes
Comments
Share


@organics12
Follow
Changed into final pots ( 15L ) and into the final tent (240x120). The repotting was urgently necessary because all the nutrients from the old soil were used up and the pots were completely rooted. I probably should have repotted sooner

Processing
Likes
3
Share


@CoC407
Follow
The plants are growing fast, we forgot to check pH in this week but no problems.

Likes
14
Share


@Curbyourenthusi
Follow
***********************************************************************************************************
START OF WEEK
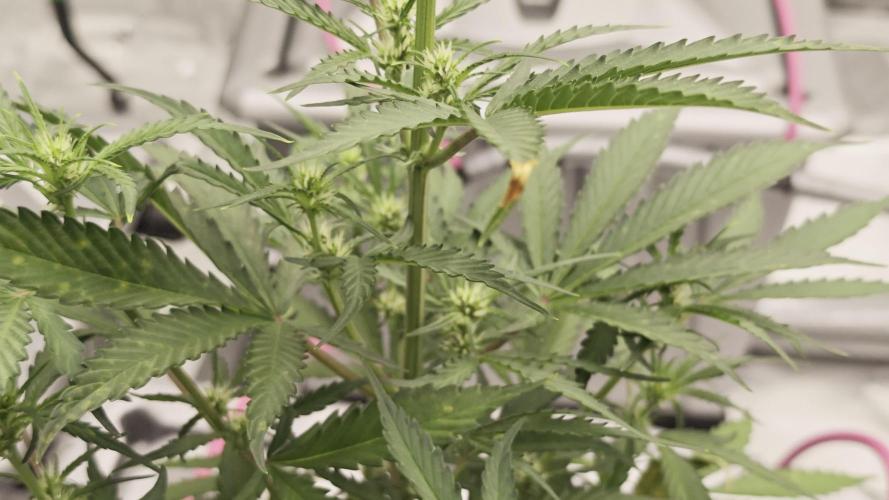
The Hawaiian Lion (right) and Tricho Jordan (left) are the two plants that dominate the face-on tent photos, and for good reason. Each of those plants is twice the mass of either Chimera. The HL is superior in bud sites, resin, and terp intensity, but the Tricho and the good Chimera #3 are both not too far off in resin production and aroma profiles. The weird runt is frosting up too, so we're looking at getting something unique and quality from each.
That is, if I don't muck this up.
I fed last night, and as part of that process, I mix my nutrients in a four gallon batch at a double(ish) strength. I then add that to my reservoir, which is shut off at that time. This allows me to work in the res, to both get the ppms right and the ph within range. I just use plain water to level off the ppms and then I adjust for ph.
What I didn't do last night is TURN back on the flow of water from the reservoir. However, you wouldn't have guessed it from how the plants woke up today (see first image). I normally check the bases of each plant daily, and in doing so today, I noticed that one felt slight dry. All tanks were empty, but all plant bases were somewhere between wet to moist. This is how I spot check, and it's worked in the past. This isn't the first time these tanks have had a catastrophic issue leading to an unexpected no flow sitch.
There's a filter that sits between the reservoir tank and the primary feed line. That has unexpectedly clogged on me in the past, but with no deleterious effect to the grow. That was caught within a day as well by testing the plant bases. I don't blame autopot for either event.
Obviously, last night I was a baked potato and just forgot a step. The clog is because I use yucca in my mix, which is an organic material that over time in the reservoir leads to build up. I'm afraid to introduce hydrogen peroxide into the set-up, so I'm just maintaining my reservoir by cleaning it fully every other week for now. I don't want to kill off the bacteria in the environment. I'm also using some fungus, too, so I'd rather promote coexistence of a microbiome than serialize it, especially considering the plants seem to be on pace.
****************************************************************************************************************************************************************
END OF WEEK
Shit! I've got a herm. I've found four nanner clusters this week, all on the lower third-ish of the Hawaiian Lion. Someone, thankfully, spotted it in the purple flower pics. Turns out, while super fun to look at, those sweet violet flowers turned into harbingers of mother fucking doooooommm.
I've never seen this before. I guess I've been fortunate, but I've also never had a camera this capable before either. I had no idea how small these pee pee's were. I guess I was expecting girth, but shame on me for not knowing. I rapidly learned as much as I could over the last two days, and I've come to the conclusion that I may or may not be screwed. The consensus on my situation ranges from either burn my tent down to thank ja for the blessings of feminized seeds. We're riding this baby out.
I think I have fifteen to twenty days left and I think these little nanners might have been in action for ten days, hopefully less. I don't know what kind of damage will be done in that time, but honestly, I'm not too worried. While disappointing, my use case is a personal supply of bubble hash and flower rosin. If it's seedy, I'll wash most of it.
I don't know what caused it, but I'm thinking a light leak or genetics. The environment is dialed and that plant hasn't shown one sign of anything less than vigor throughout. The spots that developed the purple flowers (lower bottom half to bottom quarter) are all in the vicinity of where I found the herms (four locations) and these locations are close to the edge of the tent along the zipper. I'm vigilant about keeping my tent and grow space in order, but a light leak can't be ruled out. I'll have to test that after the harvest.
The herm flowers are minuscule and I'm surprised I found them. The camera was a great tool in this case. I sprayed the areas that I removed the nanners and then dried it, but for what it's worth, I think the damage was already done. That water bit felt more like ritual, but I'm still feeling optimistic that I'm not totally hosed.


Likes
19
Share


@CannabisAprendiz
Follow
Bueno , este es el segundo cultivo que realizó del la cepa "Waka" , el anterior lo tengo igualmente documentado en otro diario .
en esta ocasión cultivamos los clones que habíamos recolectado del cultivo pasado , guardando los fenotipos que nos gustaron más y los clones restantes los pasamos a floración que fueron los que se le hizo seguimiento en este diario.
El crecimiento fue bastante explosivo y reaccionaron muy bien a cada trasplante realizado .
pude observar que los clones de cada fenotipo seleccionado se desarrolló con mucha similitud al de sus madres .
El olor en vegetación es bastante discreto y en floración se pone un más intenso
El desarrollo en floración fue explosivo generando bastante resina y se vieron muy hambientras .
Al fumar se puede sentir un rico toque cítrico en las N° 4 se siente un fuerte sabor a limón en algunas flores mucho mas marcado que en otras,
N° 3 y 13 un agradable toque a naranjas muy rico de sentir en el paladar , La N° 8 con pizcas dulces bastante interesantes.
El humo al fumar es muy suave lo que permite sentir mejor el sabor de cada fenotipo.-
saludos y buenos humos😉
Al momento de cosechar se cortaron los clone y se dejo secando en oscuridad a temperatura ambiente por cerca de 16 días posterior a eso se pasó a curar en frascos

Likes
19
Share


@creichs
Follow
Got the screen in this week and managed to weave the plant into it somewhat
Switched to flowering this week and can already see it starting to stretch
Cant wait to start seeing some buds
Likes
20
Share


@HisHope
Follow
11/30
Starting the week a day early have things to do tomorrow.
Fed @6.5PH 1 gal w/ 15ml Bio-Bloom 5ml Bio-Grow 5ml Fish Sh!t
The new bud explosion after the Recharge encouraged us to feed heavier than we would, seems to be working.
Either way this is the week.
Giving her a couple more days she what she can do.
12/3
Harvest day tomorrow and her great adventure ends
Likes
12
Share


@DawgBoi
Follow
The flowering is really starting to weigh on the branches so I supported them with bamboo sticks and everything is looking pretty good. Ill be posing more photos at the end of the week.

Likes
44
Share


@Jays_Not_Here_Man
Follow
We have a stand out! There is one beautiful girl that is showing some beautiful colour, structure, frostiness, and fade ❤️ they are all very dense and frosty but this one girl has stolen the show. I cut their nutrients to almost nothing after running phd water for two waterings consecutively, still a few more weeks to go. I’ll be starting my routine soon if just phd water, but in a slightly higher volume to start breaking up any pockets or salts that may have been forming. Thanks for stopping by, won’t be long! 🇨🇦❤️👊

Processing
Likes
30
Share


@Canadian
Follow
I use all 3 General hydroponic nutrients and they are two different pot sizes the Moby Dick is in 30 liter and the blue amnesia is in 18 liters has a very strong odor and blue amnesia is maturing at a faster rate then the Moby Dick.
a scrog net is being used in order to give support to the upcoming buds.
I am also actually on week 4 I just made a mistake calculating the week.
this is my first grow ever.
also I'm not sure if using the scroll net it's a good idea for support rather than tying those branches up .
I am watering every two days feeding nutes every single time at 900 to 1000 PPM ph at 6.2 the plans have not show any signs of stress but I am worried if it is too much nutrients the plant seems to grow very fast after every watering and seems to be loving it.
the blue Amnesia XXL Auto it's growing in soil with 30% Coco and the Moby Dick XXL auto it's growing in hydroponic soil.
the seeds were germinated on jiffy's and 100% germination rate plus the genetics seems to me very resilient to heat and everything else including lots of nutrients.
the moby Dick XXL auto are the two in the front closest to the camera the two farthest to the back of the tent are the two blue amnesiaXXL auto.
today day 31 i did some pruning actually lots of pruning hopefully don't cause stress to the plants or even worse cause them not to bud that nicely regardless the scrog net seems to be working just fine helping them access more light and making it easy for cutting leaves that are no longer needed.
32 yesterday after watering and sleeping today they have show no signs of stress in fact they starting to stretch in the buds that we're not getting sufficient light have start to grow also yesterday from the 16 liters I prepare instead of 3 ml of grow formula I add 6 1/2 to compensate for stress and the need of healing and having new grow stretch. also temperature has dropped dramatically outside making my house cold down from 24 degrees C to 19° at night internal temperature is remaining the same from 30 to 26 C.
Day 33 I have been raising the scrog net every day and the light everyday this plant is growing very fast I also notice that where the fan is hitting all the time that plant is bigger I have been moving the fan to other sections of the grow tent to see if any reaction happens and it looks like it makes the plant grow faster . I will not be moving the Scrog net any higher Rather I will introduce another one once they require more support .
Day34 notice some of the top leaves are showing a curving down like over-watering without actually over water I think they're showing signs of too much nitrogen .for the next water session I will hold back on nitrogen until I see signs of a fully recovering meaning leafs pointing up.
thank you for reading have a happy grow.

Likes
1
Share

@nijuana
Follow
Had some potassium/phosphorus deficiences due to the switching from veg to flower so fast ^^

Likes
23
Share


@eldruidamx
Follow
Day 85. Skipped
Day 86. Fertilizers
Day 87. Skipped
Day 88. Clean water
Day 89. Skipped
Day 90. Fertilizers
Day 91. Skipped

Likes
39
Share


@valiotoro
Follow
Hello everyone 🤩
she grew fast and with a beautiful green colour on the leaves!
She has responded superbly to low stress training and topping & i defoliated her aswell and seems didn't even notice 😎
Wish you all a good day and happy growing
Likes
26
Share


@ButterfliesLittleFarm
Follow
Hello Diary.
The second week of vegetation and Hulkberries is progressing wonderfully. 👌 You have grown 20 cm and the plants look happy and healthy. The temperature is slightly higher in the middle of the day when the outside temperature is also high. Sometimes it reaches 28 degrees 😎, but luckily summer is not in full swing so temperatures are acceptable. In my case, the outside temperature also affects the temperature in the box since I don’t use air conditioning for cooling. The box is located in a smaller room without windows, the temperature is not too high. I regulate the humidity with a humidifier, and it varies between 55-65%. 💪
Unlike their Green Gelato roommate, Hulkberries stretch more in height than in width. The distance between the branches is much longer than with Green Gelato.
Starting this week, I started adding Fish-Mix from BioBizz. So this week they will get Fish-Mix, Acti-Vera and Bio-Heaven, 2ml / lit each.
Let's take a look at the activities this week:
28/06/2020. Day 10.
Watering. As I wrote earlier, the food for this week is Fish-Mix, Acti-Vera and Bio-Heaven, 2ml / lit each. P. H. I regulate with Plagron’s Lemon Kick.
02/07/2020. Day 14.
Photographing, watering and measuring height. As for watering, the procedure is the same as 4 days earlier.
Hulkberry #1 - 19 cm
Hulkberry #2 - 20 cm
All in all, everything is going well for now, Hulkberries and Green gelato have almost ideal conditions and I hope that I will continue to do so. See you next week.😀
Likes
3
Share


@BioGrowBayer
Follow
Der Stretch ist nun offiziell vorbei – die Mädels haben ihre endgültige Größe erreicht.
Alle Pflanzen stehen gesund und stabil da. Die Blätter zeigen ein sattes Grün, keine Anzeichen von Mangel oder Stress. Die Blütenbildung schreitet gut voran – erste Ansätze von Frost sind bereits sichtbar.
Heute war außerdem das letzte Mal Entlauben und Lollipoppen angesagt.
Jetzt können die Pflanzen ihre Energie voll und ganz auf die Buds konzentrieren.
Es gibt keine neuen Komplikationen, alles verläuft weiterhin planmäßig.
Ich bleibe bei meinem aktuellen Schema und beobachte weiterhin genau – ab jetzt liegt der Fokus voll auf der Blütenentwicklung.


Likes
31
Share

@valiotoro
Follow
Beautiful buds super sticky✂️
Delicious smell something new to me!
Cant Wait the curing to taste this beauty
Likes
16
Share


@HowtoBubatz
Follow
Today marks the 7th week of flowering for my cannabis plant, and it's truly fascinating to observe the changes that are taking place.
The stretching phase has officially come to an end, and now the plant is fully focused on developing its buds.
I can see that the buds are starting to swell and gain size, which is a promising sign of a healthy flowering process.
I've adjusted the feeding schedule with BioBizz products to match the plant's current needs.
Overall, the plant looks healthy and vigorous. The pistils are turning a beautiful shade, and the resin production is beginning to increase.
I’m excited to see how the buds will continue to develop over the next few weeks. I’ll keep monitoring closely and make sure everything stays on track.
Be excited for the coming weeks 💚🌱🌱
