


By continuing to use the website or clicking Accept you consent to our cookies and personal data policy and confirm that you are at least 18 year old. For details please see Privacy Policy and Terms
Accept
Likes
Comments
Share


@FirstTime97
Follow
Been a good week explosive growth first signs off early stages of flower few plants come out with spotting and few yellow leafs tent is starting to get cramped tried to spread um out as even as possible with the space we have , first dose of nutrients solo soil nutes we’ve gone with as recommended by the local grow shop

Likes
17
Share
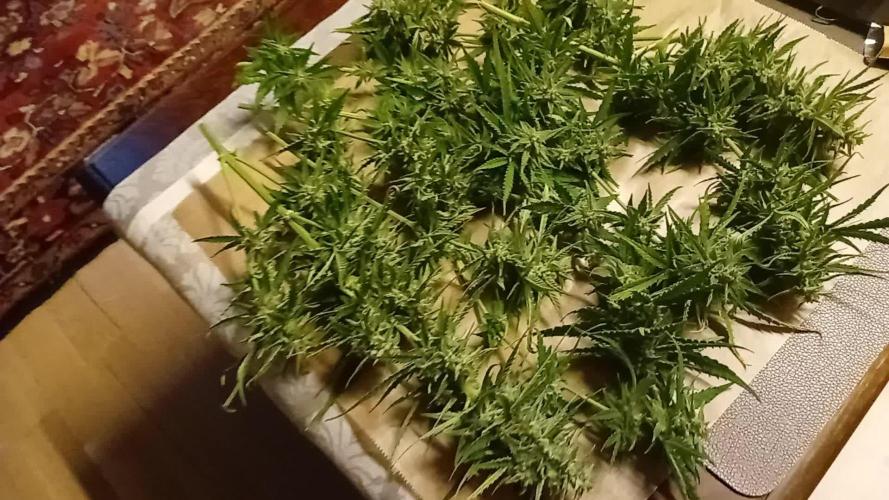

@Kushycat
Follow
Snip, snip!
Under good conditions, they could have stayed in the ground for at least another 7–14 days so that the tubers could become firm.
I didn't want to take any risks, as some of the Medusa flowers ended up in the trash can due to rot, so I decided to harvest the Sweet ZZ earlier as well. Fortunately, it proved to be very resistant to rot, and I was able to hang up the entire harvest to dry.
I can therefore absolutely recommend it for outdoor use, even under very poor conditions or rainy summers.
I did not weigh the flowers when wet.

Likes
13
Share


@madlangs
Follow
6.11.24
Gave all 1L apart from Hubba got 0.5L
Ph 9.9 2.5ml ph down in 10L = ph 6.3
10.11.24
Turned 600w light to 75% power 70cm ppfd 550 changed lights to 21/3
10.11.24
Gave all 1L apart from and lemonade got 0.5L
Recharge
2ml/L Bio heaven
2ml/L Acti Vera
2ml/L Root juice
Ph 7.8-6.4= 1ml ph down
Transplanted 2nd lemon haze in same pot.


Likes
12
Share


@1juan420
Follow
All pictures were taken on day 63
Buds are stacking up and her smell is intensifying
I gave about 2 liters with 0.7ml/l Top-Max & Bio-Bloom & Bio-Grow
More lower leaves are getting yellowish but it should be fine with current feeding✊


Likes
59
Share


@Insaniac_0
Follow
(11/25-12/01)
Hope everyone enjoys the daily progressions of overhead and side profile (Organized Chaos) Unfortunately they have too much of a toll for me to keep up with with 3 sets of grows going now, so this was the last week I am doing them on this set. I will try to add a video and black back or cover pics by end of week every week.
Week 3 Notes & Observations:
As mentioned last week, Plant 1 remains the supreme plant now and is producing nice stretch in the node spacing but is still showing a different type of leaf shape than plant 2. No issues from the mainline topping and they seem to be going okay. I will be topping again this weekend for the second of 3 total topping sessions. This topping will be 2 tops off the ends of the last and will produce 4 main colas.
**OOPS**
was being a little too aggressive in my HST while trying to set the mainline on both plants today. P1 was just a little rip of the skin, I taped her up and suspect she will be fine. However, on P2, I nearly snapped the whole branch off. I taped it and crossed my fingers hoping it works out in a week or two, but have serious doubts it will be able to mend such a large break. We'll see because I am posting ALL of the grow, the good and the bad.
VPD and PPFD:
This week I will hold the humidity in the tent to about 70-75% and temps will be monitored for 70- 75F daytime and 66-71F overnight. Im not adjusting my lights and look to control them 350ppfd max. Meaning slight increase over last week but mostly just growth increase.
Feed & Monitor:
***All feeds with nutes use either a whole ratio or combination of "Veg Mix" and "Bloom Mix"concentrates DILUTED in water until a total ppm of add-in is reached using a (Total Dissolved Solids) TDS Meter measured in PPM (parts per million). The "Veg Mix" concentrate will eventually be added in smaller ratios and "Bloom Mix" concentrate will eventually replace the "Veg Mix" concentrate entirely. The ppm and ratios of each feed will be listed when I feed. Veg mix recipe is on week 2. Bloom Mix recipe will be noted in this top message of the week that I make it.***
Day 28 (last feed was day 22)
Tested and Calibrated my ph pens. Starting weight from each pot was 18 lbs and 8 oz, P1 weighed 15lbs 12oz and P2 was 15lbs 4oz before feed. Each plant got 1 gallon of de-chlorinated tap water with 300ppm Veg Mix concentrate added (recipe on week 2 and makes 1 gallon at about 3600 to 4000ppm concentrate to dilute each feed, i.e. I only fed 300ppm above the purified water ppm this feed) The ph on this feed was balanced to 6.0ph to combat the original higher runoff ph from the first runoff feed. After feed P1 weighed 22lbs 3oz (21lbs 2oz after last feed) and P2 weighed 21lbs 14oz (20lbs 14oz after last feed). I got about 5cups of runoff on P1 (9 cups last feed) and 5 cups on P2 (7 cups last feed) . Runoff for P1 ph was 6.45 with 1170ppm (6.45ph with 980ppm last feed) and P2 was 6.45 with 1230ppm (6.45 with 1130ppm last feed). Top soil tested at: P1 6.35,6.3,6.33,6.33 for an avg of 6.327 (6.497 avg after last feed) and P2 tested at 6.47,6.37,6.26,6.51 avg 6.402 (6.46avg after last feed) - next feed will be 6.3ph as Im liking where the ph is so I dont see any issues, but will continue to monitor this way.
Day 34 (last feed was day 28)
Tested and Calibrated my ph pens. 1st Starting weight from each pot was 18 lbs and 8 oz. Before feeding this time, P1 weighed 14lbs 14oz (15lbs 12oz before last feed) and P2 was 14lbs 7oz before feeding (15lbs 4oz before last feed). Each plant got 1.5 gallons of de-chlorinated tap water with 98ppm Veg Mix concentrate added to flush any salt builds in the soil (recipe on week 2 and makes 1 gallon at about 3600 to 4000ppm concentrate to dilute in each feed, i.e. I only fed 98ppm above the de-chlorinated tap water ppm this feed) Due to this soil showing a possible calcium deficit, I am starting a 1ml per gallon add-in to test on all plants using this soil, so I added 1.5ml of CaliMagic (General Hydroponics 1-0-0) to each plant's feed then I ph balanced before feeding. The ph on this feed was balanced to 6.3ph. I used knitting needles to help both aerate the soil and create new water pathways for the roots. (a practice I may consider a new feeding standard) After feed, P1 weighed 21lbs 9oz (22lbs 3oz after last feed) and P2 weighed 21lbs 7oz (20lbs 14oz after last feed). I got about 11cups of runoff on P1 (5 cups last feed) and 11 cups on P2 (5 cups last feed). Higher runoff volume was expected with the feed volume increase for flush this round. Runoff for P1 ph was 6.65 with 838ppm (6.45 with 1170ppm last feed) and P2 was 6.60 with 879ppm (6.45 with 1230ppm last feed). Top soil tested at: P1 6.58,6.57,6.58,6.67 for an avg of 6.600 (6.327 avg after last feed) and P2 tested at 6.47,6.61,6.64,6.64 to avg 6.590 (6.402 avg after last feed) - next feed will be 6.0ph as I'm still liking where the ph is, but rather see it closer to 6.3 or 6.4 top and bottom. I dont see any issues with the feed's data other than the possible calcium deficit and I will continue to monitor runoff ppms as I expected this to be higher with more runoff.
Hope everyone enjoys the daily progressions of overhead and side profile (Organized Chaos) Unfortunately they have too much of a toll for me to keep up with with 3 sets of grows going now, so this was the last week I am doing them on this set. I will try to add a video and black back or cover pics by end of week every week.
Likes
5
Share


@prebiancagrower
Follow
So, I start the harvest last week, but didn't get time to post here, first were the top bud, and this week I got the rest of the plant, it is a good strategy as the lower buds could develop a little more!
Amazing growth! I am very happy with the wield, it was my 3 growth at all and my first LST! Great results!
Thank you all for the support! Now I will stop for 3 months, going to Africa for a little bit! :-)
Likes
27
Share


@Bread_n_Buds
Follow
Our Ghost Train Haze automatic has started to flower, here the main lining didn't work well but it worked really well. It's a plant that responded very well to topping right away and you could see it growing at a fantastic rate.
Here the topping was done at the third internode, mainfold and then we continue for another three internodes and topping again. You can decide to cut something along the way here there is really a lot of stuff that seems to be going very well. . Anyway you leave more or less everything that manages to see a decent amount of light enough to flower well.
The plant is an exemplary one with a wide internodal distance I managed to work it very well, the appearance is truly impressive and the structure is really very very beautiful.
Here we are at the moment of truth, the flowers are starting to form, our Ghost Train Haze reveals its sex and of course like all Zamnesia plants I will be the father of two beautiful females.
One is growing straight but I will show it to you later because I have been focusing a lot on this one in main - lining. It is a plant with a wide internodal distance so we have more time to shape it before the woodification and it lends itself very well to late last interventions.
I managed to open it on the main line very well and the lateral branches are really, growing and stretching properly.
We will not see the super productive trees of the autumn harvest but I am willing to bet that we will have lots of beauty and lots of resin in beautiful bush-sized plants.
Wait for the uncle BreadandBuds....
We are still using soil, feeding and all the recommended additives from Plagron 100% organic. We have moved on to the flowering start schedule that keeps the same Power Roots additives - Sugar Royal, Pure Zym and adds the flowering stimulant dear in my house for obvious reasons of Biscotti. Of course the basic fertilizer is now Alga Bloom.
The Green Sensation when the flowers are already a bit swollen, do not start immediately. The Power Buds must immediately stimulate the start and development of the buds.
---- Decide on the right soil and calculate your fertilizer schedule based on the soil on the official website.
-- www.plagron.com
Try a seed of this strain that drives us crazy..
---- https://www.zamnesia.io/en/12511-zamnesia-seeds-ghost-train-haze-auto.html
Zamnesia Description // From the day its cotyledons emerge from the substrate, Ghost Train Haze Auto will surprise you with its rapid growth and robustness. When it starts to flower, this short sativa will develop long and compact buds with pungent scents of spice, citrus and fuel.
All the best that mother nature can offer is on ---- www.zamnesia.com

Likes
14
Share


@Momgrowsthechronic
Follow
So, Week 4 is done and the Sweet Seeds Gorilla Girl XL Autos are slowly coming along. It has been even colder in Canada this past week and temperatures in the tent have been hovering around the 70 degree mark. The humidity has come up a bit to around 30% and this is an improvement but the combination of too cold + humidity too low = small, struggling but surviving plants. It’s disappointing but this is consistently my toughest grow cycle of the year. Other than that, I increased the water to 4 litres per watering which is still being done every 4th day- so that’s 0.7 of a litre per plant per day. Although I was planning on topping all four of these plants following my previous Sweet Seeds grow experience, these ladies are just not up for it- too small, too slow and surviving not thriving. I will look forward to that with my next and final Sweet Seeds grow so stay tuned for that in future.
Mom’s Tip for Week #4- Cleanliness is next to Godliness!… I wholeheartedly feel that a clean and organized tent/grow room is essential for a successful grow. I often see other growers leaving dead foliage to pile up in the bottom of their tents, watering with no drip trays or not cleaning their space in between grow cycles. They are often plagued with unwanted visitors, fungal infections and a nasty build up of crud in the most precious place- your happy garden! Here are my top tips for keeping your tent/grow room clean, organized and consistently productive. Always remove dead or defoliated foliage from the bottom of your tent and take it all the way out of the immediate growing area/room. Biodegrading foliage provides the perfect environment for unwanted insects/pests to hide in and feed on- potentially creating an infestation that could devastate your crop and contaminate future grows. I place all green materials including my post harvest plants into the compost pile where it breaks down creating beautiful, natural fertilizer for future grows! Always use drip trays when watering or clean up excess dirty water that seeps through your pots/containers- potentially creating ideal conditions for various fungi and molds that can affect your plants, equipment and perhaps even you. I use inexpensive, plastic drip trays to catch any run off instead of relying on the waterproof bottom that is sold with my tent. I have personally witnessed the mold that can grow on and between these waterproof bottoms and the actual bottom of your tent as well as moisture so severe that it rotted through the stitching/seams of an otherwise perfect tent. Always clean your tent/grow room in between each and every grow cycle as well as throughout the grow as needed- potentially avoiding cross contamination from the previous grow and maintaining a high daily standard. Aside from insects and pests, fungi and molds- pollen from a previous grow gone wrong can wreak havoc on future grows if not dealt with correctly. I thoroughly vacuum my entire tent and wipe it down with a hot water/bleach solution applied with a spray bottle and a clean cloth. I also use a cordless Black and Decker hand vac conveniently mounted on a wall near the tent for daily maintenance and clean ups as needed. Keeping your tent, immediate grow space and supplies organized will also make things easier. I keep everything up and off the floors and if possible stored in rubbermaid type containers. This allows for quick and easy sweeping/vacuuming, wiping/dusting and the deep cleans required in between grows. All of the above mentioned tips will help increase the odds in your favour for a successful grow/harvest but they will also increase the longevity of your equipment too. Growing Cannabis at home can be quite a hefty initial investment so if a little light cleaning can make my core components (tent, lights, intake/exhaust fans, etc.) last longer, work better and equal more bang for my buck- it’s a no brainer!

Likes
22
Share


@fungrow
Follow
week 9 budding is complete and took#1 after 9weeks,1 day...the other2 in may be a week...harvest pics next week

Likes
20
Share


@Automaniac
Follow
Welcome to week 6 / week 3 of flowering!
She stretched like crazy the past 10 days, but it has slowed down now as we enter week #6. Everything has gone very smoothly so far. I will probably do some defoliation this week because it’s getting crowded in the middle.
✅Day 36: No water.
✅Day 37: No water.
✅Day 38: 96oz of water. Defoliated bottom and center.
✅Day 39: No water.
✅Day 40: 96oz of water.
✅Day 41: No water.
✅Day 42: 96oz of water.


Likes
9
Share


@Krissci
Follow
Day 1 - LST train both plants... Mostly SB1 to have a wider canopy let the smaller nodes catch up.
SB2.. Nice structure, really upset to break 1/2 of it... But loads of energy and recovered /train well.
Nodes larger than SB1, but SB1 has mode nodes

Likes
14
Share


@BLAZED
Follow
W17 (22-5 to 28-5)
28-5
The plants are slowly dying so i decided to chop them tomorrow and throw the buds in the freezer to make some bubble hash in the future.

Likes
25
Share


@Grower_Of_Persia
Follow
week intel:
we getting close to end of ripening , this week i raised drought , Nitrogen and E.C stress by feeding them 2 times per week and raised e.c to 3 to cause real stress that will help increase terpenes production
stresses :
Nitrogen deficiency Stress by removing the fertilizers that has N in them
Drought stress via removing one meal in week
high E.C stress around 1.7 and the other feeding day 3.0 , 2 times a week
feeding:
no more Nitrogen
i feed them 2 times this week with this order :
day 1 : i feed them high with Bio-Bizz Top-Max + Feeding Booster about 850 ppm - 1.7 e.c to cause a medium e.c stress.
day 3 : no more feeding this day
day 5 : i feed them very high dose of Bio-Bizz Top-Max + Feeding Booster around 1500 ppm - 3 e.c to cause high e.c stress
guide of the week :
be patient in the last weeks, never hurry for harvest because its the time of ripening in last 2 weeks you should let plants to do their work
last weeks of ripening is the time to break the limits we should cause 3 stresses as i said above Nitrogen stress , Drought Stress , E.C Stress

Likes
29
Share


@gottagrowsometime
Follow
Welcome to my Tiny/Rare Pot Diary for seedsman contest.
Wk 3. Days 15-21. Plant has picked up this week. Leaving behind her issues from the 2nd week. (Which I now know where caused by the extreme high PH bioenhancer adds to the soil. On normally terms it would be fine. But, as I used a light mix soil.) I found out again the hard way coming into the later stage of this week. More PH issues showing up on the healthy growth. (And it came 2 days after adding the bioenhancer, all I need to do, is treat it as if it was coco and PH the bioenhancer to bring it back down to 5.8 ish.. just until the soil has had time to change itself and have better nutrient uptake. (So anyone using bioenhancer with biobizz light mix soil, pH it as it says to do as if you were using coco)
Other than coming back into PH issues. The plant is doing fine. Locked out of certain things like calmag at this stage. I should of mixed some all mix with it, and I doubt I'd be having any issues at all. But, growth has been good this week. Hopefully this will be the last of my mistakes brought out onto this poor girl. Nodes are growing, and taking a nice shape. For been in a .75ml plastic bottle, I just have to keep her environment, (substrate) in desired levels.
The Bioenhancer is meant to give a PH of 9ish with water. But, shouldn't affect any soil but says with coco, you need to PH..It's just I used light mix, and that's more coco than soil, and takes time to be treated. All my other plants took these feeds just fine, as the soil was mixed with all mix soil + light mix.
The injection of my AIrPump seems to be going well. But, hard to tell, what kinda impact its having.
Thanks for viewing this week. Be sure to drop a like or comment so I can visit your diaries. Either way, thanks for dropping by.
Stay safe my friends.


Processing
Likes
26
Share


@Master_weeda
Follow
Un rendement très intéressant pour une autofloraison une herbe de très bonne qualité avec un effet très agréable et un goût de baie citronné et une légère note d'épice
Je recommande tous les amateurs d'herbe goûteuse cette variété

Likes
89
Share


@Targona
Follow
04/01/2023 - 56 days since my little girl sprouted from a seed
Third week of bloom for my Banana 🍌🍌🍌
Nutrients:
Jungle Indabox - the girl responded well to the change in nutrients, so I continue to feed the same as last week when I adjusted the nutrients for flowering
Jungle Environ X - bud stimulators 🌼
Bud Candy - bud stimulators 🌼
Atami - ATA Calmag - it is recommended to use Calmag when growing under LED lights
I stopped the Hesi Root Complex - no longer recommended this week
Training:
LST: just a slight LST, I attached some small twigs with string to let more light shine on them 💡💡
Defoliation: I did more defoliation so that the leaves did not overshadow the already forming buds and the plant could breathe freely - Banana was not so leafy, but it still needed a good cut 🍃🍃
Light: Mars Hydro TS1000, the girls are doing amazing under this great light, I can see a big difference compared to my past results 💡💡💓
In general:
The girl is very strong, she has a strong stem - trunk, that is the basis for a proper plant 🌴.
It is a sativa, which is why it has the highest photoperiod in the tent.
Buds are already forming at the ends of the twigs 🌸 and there are many branches 🌾. It resembles a small dense bush. I'm already proud of her 😇
Apology: Being sick I'm late with my diaries, for which I apologize 🤒🤒
The tent emits a soft scent that is mainly reminiscent of fruit, but it is a gentle whiff 🍇🍌
Thanks for the likes and you can follow me on Twitter 🐦: @ Targona666
See you soon 😍
Likes
10
Share


@MadeInGermany
Follow
Hey guys :-) .
Today the plant was sprayed again with neem oil.
There weren't any more trips to be seen after the second application, but to be on the safe side, you did it again today get a cure.
That's why the beautiful dark shimmer on the leaves :-).
The ladies are developing well and have 1 week before I change the time to flowering.
Normally I would let it get bigger and train because the tent only has 80x80 and 180 watts are available, so I will switch it over soon enough.
This week it was poured twice with 0.8 l each time (for nutrients, see table above).
Otherwise everything was cleaned and, as always, everything was checked.
Have fun with the update and stay healthy 🙏🏻
👇🏼👇🏼👇🏼👇🏼👇🏼👇🏼👇🏼👇🏼👇🏼👇🏼👇🏼👇🏼
You can buy this Nutrients at :
https://greenbuzzliquids.com/en/shop/
With the discount code: Made_in_Germany you get a discount of 15% on all products from an order value of 100 euros.
👇🏼👇🏼👇🏼👇🏼👇🏼👇🏼👇🏼👇🏼👇🏼👇🏼👇🏼👇🏼
You can buy this strain at :
https://www.exoticseed.eu/
Water 💧 💧💧
Osmosis water mixed with normal water (24 hours stale that the chlorine evaporates) to 0.2 EC. Add Cal / Mag to 0.4 Ec Ph with Organic Ph - to 5.8 - 6.4
MadeInGermany

Likes
15
Share


@AlienScrOG
Follow
is the one of the first auto ... is veri good .. but i want to grow again....... about norther light i have burn the pistilll ... cry cry ... i have use so much pk .. is not in the vid but the day after vid all is burn and brown ...... omg fail pk .. 1 years ago ... now ?? look my new diary <font style="vertical-align: inherit;"><font style="vertical-align: inherit;">👽 </font></font>
